

My Cart
0
You have no items in your shopping cart.


Are you a fan of Polish pottery? Have you ever found a cherished piece that was chipped or broken?
Don't worry! In this ultimate guide, we'll show you how to repair and restore your beloved Polish pottery to its former glory.
With our expert tips and techniques, you'll be equipped to tackle any challenge and care for your restored pottery for years to come.
So, let's get started on this journey of bringing back the beauty of your Polish pottery.
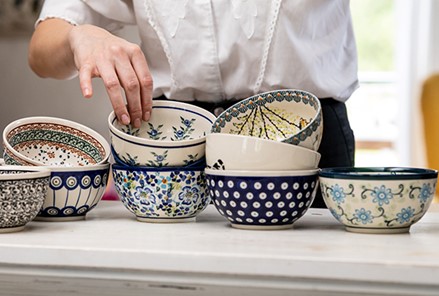
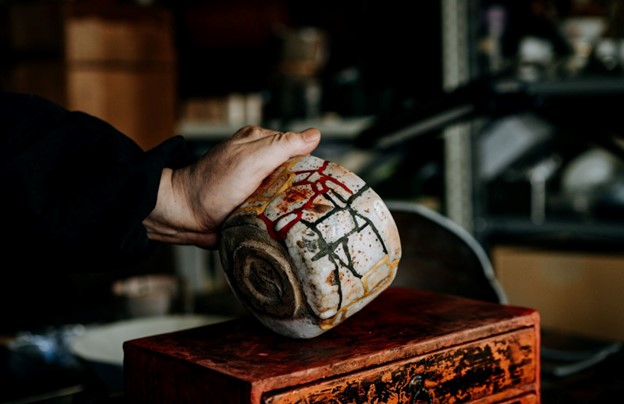
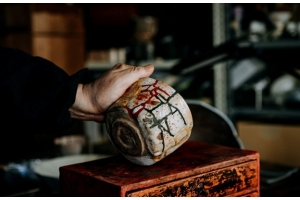
Photo from Zakladyboleslawiec
When collecting the broken pieces of the pottery, be sure to handle them with care to avoid causing further damage or injury.
Using gloves or handling the pieces delicately can help prevent any additional breakage or injury from sharp edges.
Gather all the broken pieces before starting the repair process. This ensures that you have a complete set of parts and can accurately assess the damage.
Even small fragments can be crucial for the repair, as they may contain important details or fit into specific areas.
If you are unable to find some broken pieces or they are too small to be used in the repair, you may consider using ceramic fillers or clay to recreate the missing elements.
This requires some skill and expertise in pottery restoration techniques and may be better suited for professional restoration services.
Cleaning each individual piece of Polish pottery is a simple and important task. Begin by using a soft brush and mild detergent to gently scrub away any dirt or stains.
To clean the broken edges of the pottery pieces, gently wipe them with a soft cloth or sponge. This will help remove any dust, dirt, or debris that could interfere with the adhesive bond.
Fill a basin with warm water and add a gentle, pH-neutral detergent. It's crucial to avoid using abrasive cleaners or scrubbers that could harm the delicate surface of the pottery.
Dip the soft brush into the soapy water and carefully scrub the pottery, paying special attention to any areas that may be dirty.
Take care not to exert too much pressure, as this could result in more chipping or breakage. Afterward, thoroughly rinse the piece with clean water to eliminate any soap residue.
If the broken edges have any stubborn residue, you can dampen the cloth or sponge with warm, soapy water. Avoid using harsh cleaners or abrasive materials that could damage the pottery.
Once you have cleaned the broken edges, make sure to dry them thoroughly before applying the adhesive. Moisture can affect the bonding process, so it's important to start with clean and dry surfaces.
Putting the pieces back together requires a delicate process. Look for an adhesive that is specifically designed for pottery or ceramic repairs.
Epoxy glue or specialized ceramic adhesive brands are great options. Do not use standard household glue, as it may not provide a strong and durable bond.
Before applying the adhesive, it's crucial to do a 'dry run' to ensure the broken pieces align properly.
Apply a thin layer of adhesive to one of the broken edges. Use a small brush or a toothpick to ensure precise application. Avoid using excessive glue, as it may overflow when you attach the pieces.
Carefully align the broken edges of the pottery pieces and press them together firmly. Hold them in place for a few minutes to allow the adhesive to set.
In some cases, you may need additional supports or molds to hold the pieces in place while the adhesive cures.
Make sure to follow the adhesive manufacturer's recommendations for curing time. Typically, it takes around 24 hours for the adhesive to fully bond and harden.
Photo from Zakladyboleslawiec
Now that you have successfully reassembled the broken pieces of your beloved Polish pottery using specialized adhesives, it's time to move on to the next step: filling and sculpting any missing areas or gaps.
To accomplish this, you'll need a compatible material that can seamlessly blend with the pottery's original texture and shape. Options include epoxy putties, plaster, or custom-made ceramic fills.
For smaller repairs, epoxy putties are the perfect choice. They can be easily molded and shaped to match the pottery's unique contours. Imagine using clay to mold a masterpiece; it's a similar process.
If you're dealing with larger areas that require attention, plaster comes to the rescue. By mixing and pouring it into the gaps, you can achieve a smooth finish that seamlessly merges with the surrounding pottery.
Don't hesitate to call in professionals for intricate repairs that demand a more delicate touch. Their expertise and materials will make sure your Polish pottery will come back good as new.
Painting and glazing your repaired Polish pottery is the final step in achieving a seamless restoration that perfectly matches the original colors and finishes.
To paint, you'll need a steady hand and a sharp eye for detail. Using top-quality acrylic paints made specifically for ceramics, carefully recreate the intricate designs and patterns of the original piece. Take your time and layer the paint to add depth and dimension, creating a stunning result.
Once the paint has dried, it's time to apply the glaze. Choose a glaze that closely matches the original finish and gently brush it onto the surface of the pottery. The glaze serves a dual purpose: it not only protects the paint but also gives the pottery a beautiful glossy finish. Allow the glaze to dry completely before handling your restored pottery.
Patience and precision are crucial in achieving a flawless final result that will delight both you and anyone who sees your restored piece.
You can also polish the ceramic to give it a smoother and flawless appearance.
To begin, use a soft cloth or a polishing pad to gently buff the surface. By working in small circular motions and applying even pressure, you'll remove any imperfections and achieve a polished finish. This technique guarantees the best results.
After polishing, consider applying a protective coating or sealant to enhance the durability and longevity of your pottery piece.
This extra layer will safeguard the restored areas and prevent future damage. Remember to carefully follow the manufacturer's instructions when applying these products to ensure proper application.
With the final touches complete, your repaired Polish pottery is now ready to be proudly displayed and cherished for many years to come.
Photo from Zakladyboleslawiec
Restoring Polish pottery poses several challenges. Matching materials and techniques is crucial for achieving a flawless repair. This requires an in-depth understanding of the pottery's composition and the ability to source the right materials.
Craftsmanship plays a vital role in achieving invisible repairs, where the restored piece seamlessly blends with the undamaged parts. Attention to detail is key to ensuring that the repaired area is indistinguishable from the rest of the pottery.
It takes skill and precision to make the restoration appear as if the pottery was never damaged in the first place. To achieve better results, you should leave the restoration to a professional.
Caring for your restored pottery is crucial for maintaining its beauty and ensuring its longevity. Once you've invested your time and effort into repairing and restoring your Polish pottery, it's important to follow a few guidelines to preserve its quality.
Always handle your restored pottery with clean hands and be cautious when lifting or moving it. Avoid gripping it too tightly, as this could inadvertently damage the restored areas.
Clean your restored pottery by gently wiping it with a soft, lint-free cloth. Avoid using abrasive cleaners or brushes that could scratch or damage the surface.
If there are stubborn stains, you can use mild dish soap diluted in warm water, but make sure to rinse it thoroughly afterward.
Choose an appropriate location to display your restored pottery, away from direct sunlight, extreme temperature fluctuations, and high humidity.
Sunlight can fade colors and cause the clay to deteriorate over time. Also, avoid placing it near heat sources or in areas where it can be easily knocked over.
When not in use or displayed, store your restored pottery in a protective case or a cabinet with padding or soft materials to prevent accidental damage. Wrap delicate pieces in acid-free tissue paper to provide extra protection.
While your restored pottery may be able to hold water, it is generally best to avoid prolonged exposure to water.
Moisture can weaken the adhesive used in the restoration process and potentially cause the restored areas to detach.
Inspect your restored pottery periodically to check for any signs of damage or loosening of restored areas.
If you notice any issues, promptly address them by seeking professional assistance from a reputable restorer.
Repairing and restoring Polish pottery is a meticulous process that involves careful examination, thorough cleaning, and skilled reassembly.
Pottery restoration presents its own unique set of challenges, but with the right techniques and care, the beauty and longevity of Polish pottery can be preserved. It's important to properly care for restored pottery to maintain its allure for years to come.


Validate your login
Sign In
Create New Account